
Ref:
http://www.mssqltips.com/sqlservertip/1492/using-policy-based-management-in-sql-server-2008/
Policy-Based Management is indeed a new feature in SQL Server 2008. It allows you to define and enforce policies for configuring and managing SQL Server across the enterprise. Originally this feature was called the Declarative Management Framework but has since been renamed. There are a number of terms that we need to define in order to begin to understand Policy-Based Management:
- Target - an entity that is managed by Policy-Based management; e.g. a database, a table, an index, etc.
- Facet - a predefined set of properties that can be managed
- Condition - a property expression that evaluates to True or False; i.e. the state of a Facet
- Policy - a condition to be checked and/or enforced
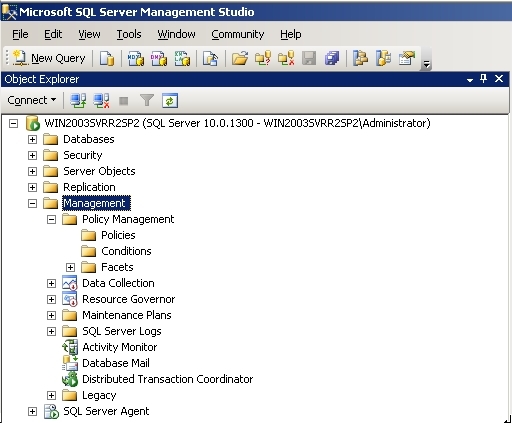
Policy-Based Management is configured in SQL Server Management Studio (SSMS). Navigate to the Object Explorer and expand the Management node and the Policy Management node; you will see the Policies, Conditions, and Facets nodes:
Expand the Facet node to see the list of facets:
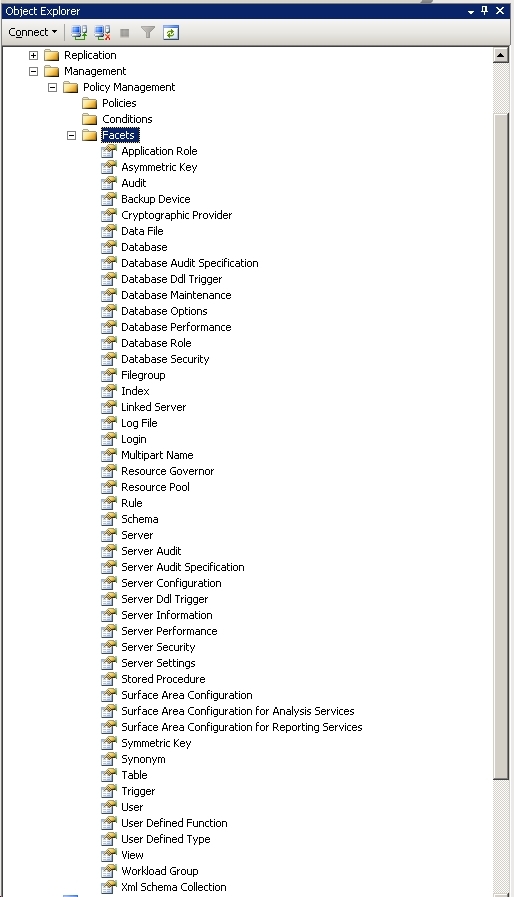
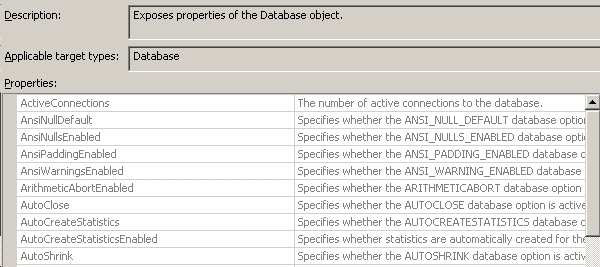
As you can see there is a rather comprehensive collection of facets predefined in SQL Server 2008, allowing you to manage just about every aspect of SQL Server. Double click on a facet to see the actual list of properties in the facet; e.g. double click the Database facet:
These facet properties are used to specify a condition; e.g. AutoShrink = False means that you do not want to automatically shrink database files. A policy specifies an expression that evaluates to True or False. The expression can be made up of one or more conditions logically joined by And / Or.
In this tip we are going to gain an understanding of Policy-Based Management by walking through the following demonstration:
- Create a Condition
- Create a Policy
- Evaluate a Policy
The demo steps below were only tested on the February, 2008 Community Technology Preview (CTP) of SQL Server 2008.
Create a Condition
The starting point in Policy-Based Management is to create a Condition. Right click on Conditions in the SSMS Object Explorer (under the Management | Policy Management node) then select New Condition from the menu. Fill in the dialog as follows:
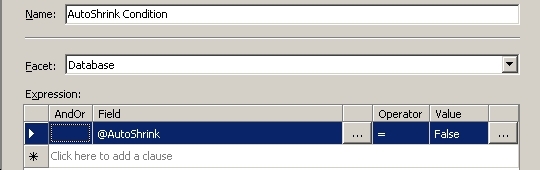
You select a single Facet for a Condition, then enter an Expression. The Expression evaluates to either True or False. This is the essence of Policy-Based Management which will test whether the Condition is True.
Create a Policy
Right click Policies in the SSMS Object Explorer (under the Management | Policy Management node) then select New Policy from the menu. Fill in the dialog as follows:
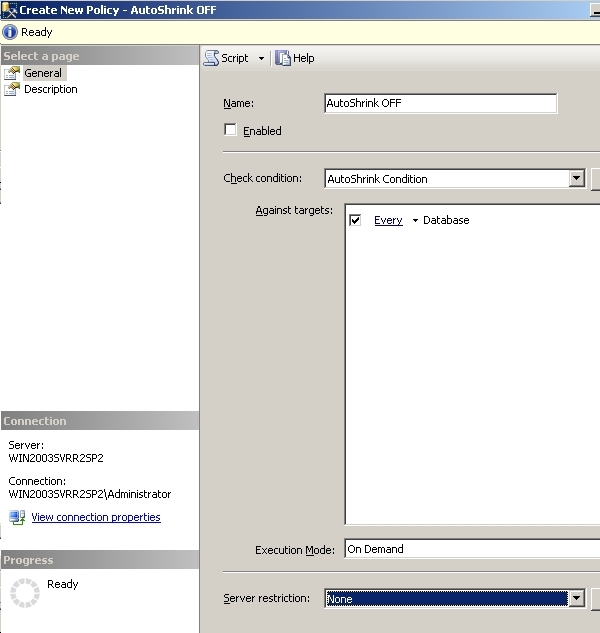
The Check Condition drop down will include the list of conditions that you have defined. You can check Every Database in the Against targets list, or you can click the glyph (between Every and Database) and define a condition. Execution Mode can have one of the following values:
- On Demand (this is the default)
- On Schedule
- On Change - Log Only
- On Change - Prevent
The On Demand option only evaluates the policy when a user right clicks on the policy in the SSMS Object Explorer and selects Evaluate from the menu.
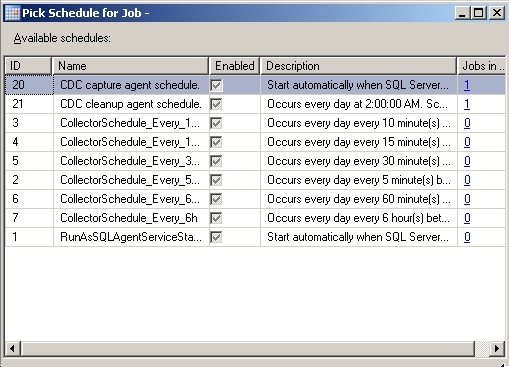
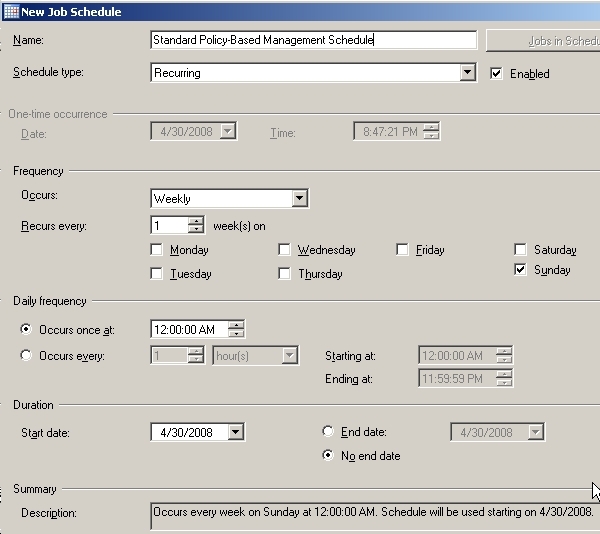
The On Schedule option takes advantage of SQL Agent to execute a job on a particular schedule to check the policy. After selecting On Schedule from the Execution Mode drop down list, you can click either the Pick or New button.
To pick an existing schedule, make a selection from the available options:
To create a new schedule, fill in the familiar schedule dialog:
When policy evaluation is scheduled, any violations are logged to the Windows Event Log.
The On Change - Log Only option evaluates the policy whenever the property in the facet is changed and any violation is logged to the Windows Event Log. The On Change - Prevent option evaluates the policy whenever the property in the facet is changed and actually prevents the change; this option uses DDL triggers to enforce the policy. Not all changes can be detected and rolled back by DDL triggers; the Execution Mode drop down list will include the On Change - Prevent option only when it is available.
One final note on the policy setup concerns the Enabled check box. When the Execution Mode is On Demand, the Enabled check box must be unchecked; for all other options you must check the Enabled check box in order for the policy to be evaluated.
Evaluate a Policy
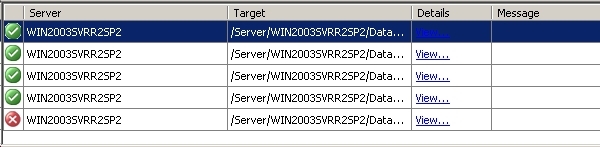
To evaluate a policy on demand, right click on the policy in the SSMS Object Explorer and select Evaluate from the menu. The following is a partial screen shot of the output from evaluating a policy on demand:
The green check icon signifies that the policy evaluated to True for the databases shown. Not shown above is a Configure button that allows the user to automatically fix a target where the policy evaluates to False.
Right click on a database in the SSMS Object Explorer and select Properties from the menu. Click the Options page and change the AutoShrink property to True. Evaluate the policy again and you will see the following output:
Note the red icon with the X indicating that policy evaluation failed for a particular database. Not shown above is the Configure button which you can click to automatically change the AutoShrink property to comply with the policy.
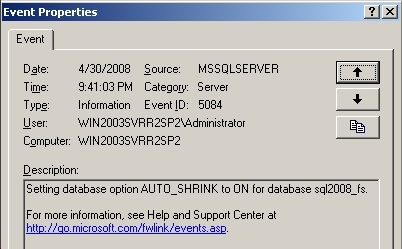
Edit the policy and change the Execution Mode to On Change - Log Only. Select a database and change the AutoShrink property to True. Open the Windows Event Viewer, click on Application and you will see an event that was written when the policy evaluation detected the violation:
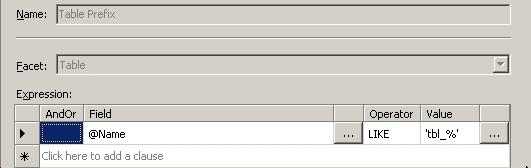
To test the On Change - Prevent Execution Mode for a policy, create a new condition and a new policy. Create a new condition as follows:
Now create a new policy as follows:
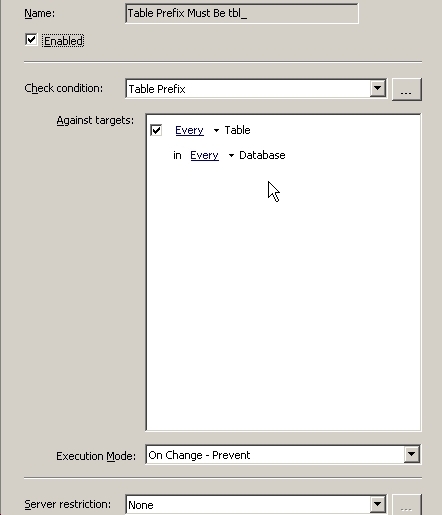
This policy will prevent a table from being created if the table name does not begin with 'tbl_'. Open a New Query window in SSMS and enter a create table script. When you execute the CREATE TABLE script you will get the following error message and the table will not be created:
CREATE TABLE sample ( message varchar(256) ) Policy 'Table Prefix Must Be tbl_' has been violated by '/Server/(local)/Database/demo/Table/dbo.sample'.This transaction will be rolled back. Policy description: ''Additional help: '' : ''. Msg 3609, Level 16, State 1, Procedure sp_syspolicy_dispatch_event, Line 50 The transaction ended in the trigger. The batch has been aborted. |
To Evaluate and Implement Policies in Multiple SQL Server Instances
Ref:
http://www.mssqltips.com/sqlservertip/1493/evaluate-and-implement-policies-in-multiple-sql-server-instances/
Policies in SQL Server 2008 can be evaluated on the instance on which it was created. But one of the most tedious task that a database administrator needs to do is to go thru each of the SQL Server instances he or she manages and implement those polices. What database administrators do most of the time is to implement the changes on a test environment before rolling it out to production. However, we do not want to individually export and import; we want to apply it to all the servers at once. We can use our test server as a configuration server, then define the other servers as targets for this policy. Fortunately, we have the ability to export those policies as XML files for storing and even for multi-instance evaluation.
Exporting a Policy
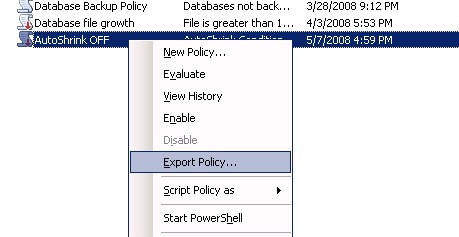
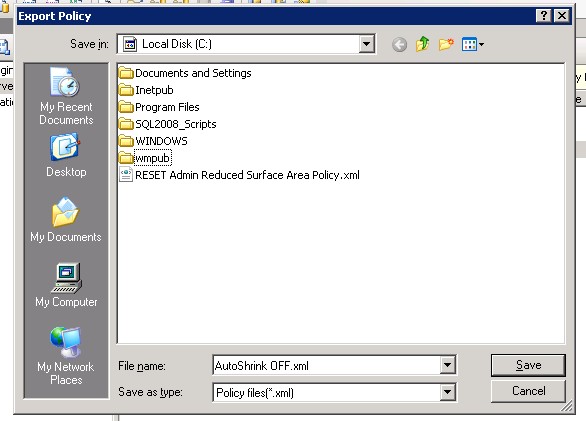
Referring to the example provided in the tip on Policy-based Management, let's export the policy to an XML file. Right-click on the policy and select Export Policy. I have selected the AutoShrink OFF policy, in this example. Save the policy on your local drive for reference. I'll use AutoShrink OFF.xml for my filename.
Now that we have a copy of the policy as an XML file, we can now use this to evaluate other SQL Server instances we manage. Let's start by creating a server group to register the instances we manage.
Creating a Server Group
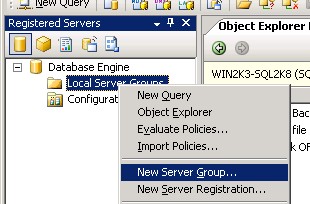
In SQL Server Management Studio, open the Registered Servers tab. You can create a new server group for ease of management or register your servers under the Local Server Groups. In our case, let's just create a new server group named Application Servers.
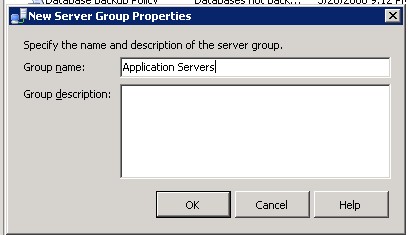
Right-click Local Server Groups and select New Server Group. Specify Application Servers in the Group Name field and click OK .
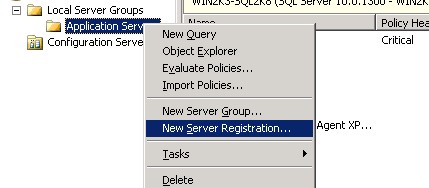
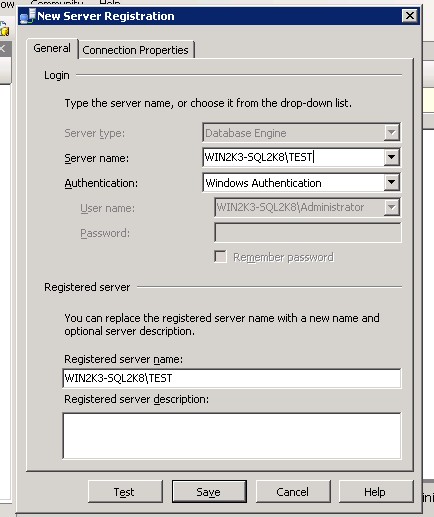
Next, register your SQL Server instances on Application Servers group. In my example, I'll register three SQL Server 2008 instances. Right-click on Application Servers group and select New Server Registration.
Once you have registered all the instances you need to manage, it's time to test the policy against them all at once.
Evaluating the policies against multiple instances
Since you already have your defined policy as an XML file, we can use that as a reference to evaluate the instances registered on your server group. Right-click on Application Servers group and select Evaluate Policies.

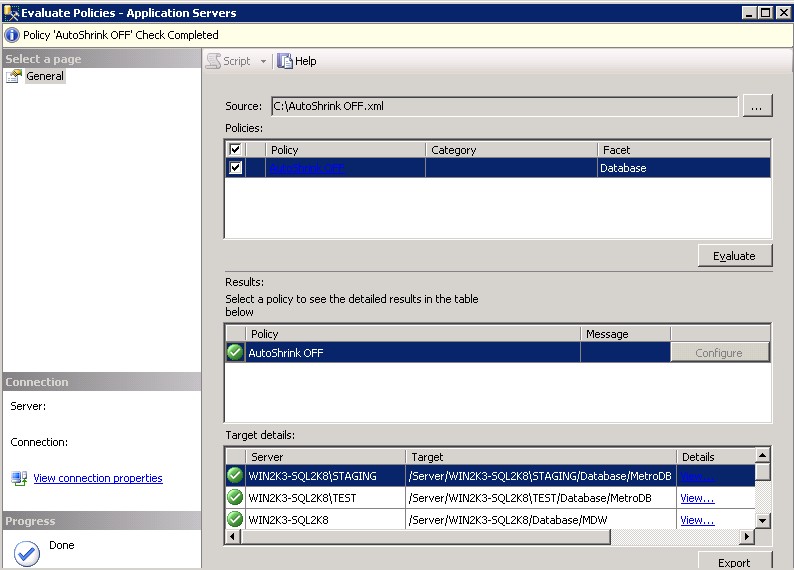
This will open up the Evaluate Policies - Application Servers window. On the Source field, click on the ellipses button and select the AutoShrink OFF.xml file which you generated.
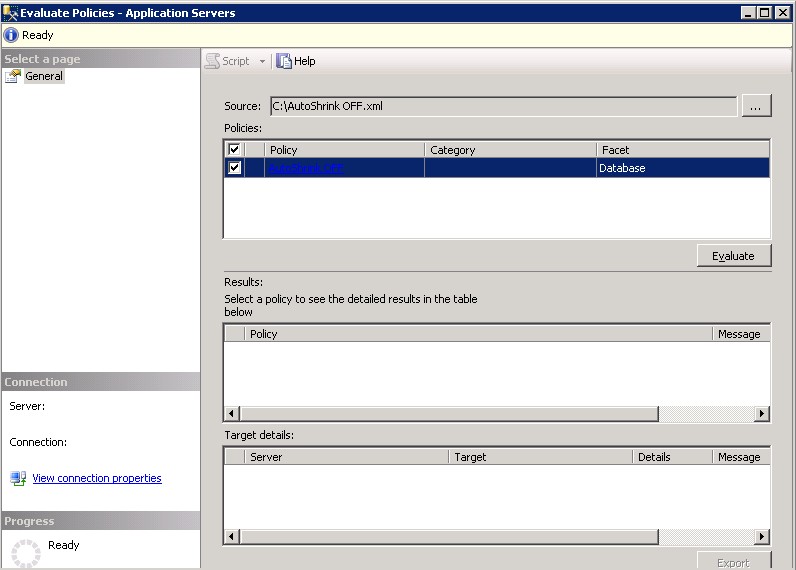 |
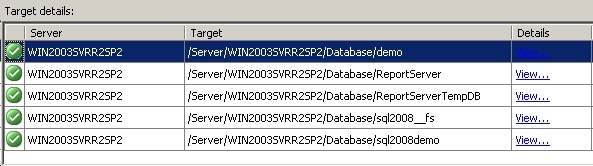
Make sure that the AutoShrink OFF policy checkbox is checked. Then, click the Evaluate button. You will notice that the policy has been evaluated on not just one but all registered instances. From my registered servers, you will notice that one instance has at least one database which is out-of-compliance, in the case of the WIN2K3-SQL2K8\STAGINGinstance, the MetroDB database, as the red icon on the AutoShrink OFF policy indicates.
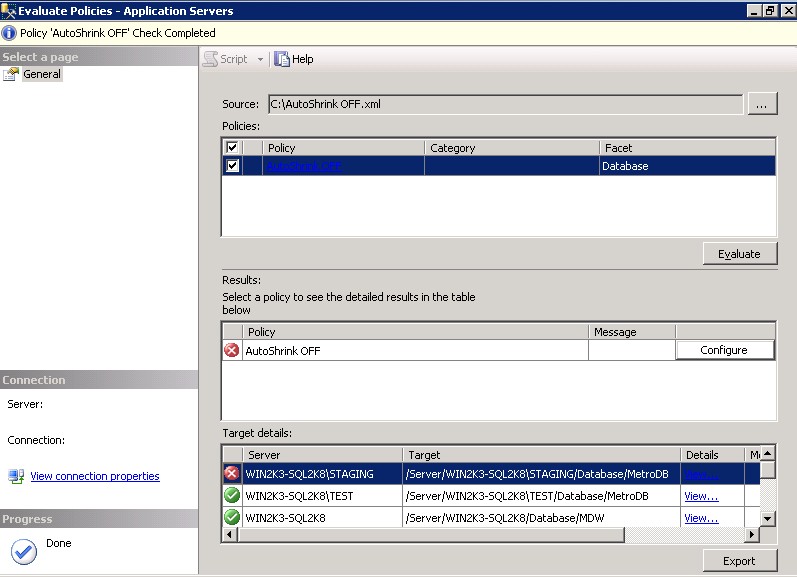 |
You can opt to implement the policy one at a time or you can do it on all instances at the same time. You can click theConfigure button on the non-compliant database to apply the policy on one database at a time or click on theConfigure button on the AutoShrink OFF policy to apply the policy on all databases on all registered instances. This makes it easy to configure multiple servers at the same time. By doing so, you'll see that all the databases on all my registered instances are now compliant
 |
No comments:
Post a Comment